Showing posts with label Journey Girls. Show all posts

Monday, April 2, 2018

Girls in Science

Someone online alerted me to the She Blinded me with Science lab coat pattern that Lee & Pearl were offering free to mailing list subscribers.

With a daughter who wants to be an astronomer when she grows up, I just HAD to make it. 

Problem was, the pattern is for 18" dolls such as American Girl which, as I've previously mentioned, is a slightly different size/shape to the Journey Girl my daughter (and I) have.

Basically the patterns are too wide. Knowing this, I decided to cut the pattern out of fabric and go from there, I can always trim it down, and there is always more fabric for such a small project.


After cutting out the pieces, I laid them over the doll, and decided to take out 1/4" on each side, front and back. I took it through the middle of the shoulder right down to the hem, to maintain the side and armhole shaping. For this pattern, that meant adjusting the back, front and yoke pieces. It is a fiddly little fold. In future I think I might just cut and overlap because it will probably be easier.
1/4" total taken out of back yoke piece.
I cut on the fold so only adjusted one side of the pattern piece, but you'd need to adjust both sides if you were cutting flat.
Adjustment made to front piece
I think that worked well for this pattern, but the Elsa dress I made also seemed wide in the neck, so I need more testing before declaring it a cure-all.

Once I attached the sleeve (using the flat method) I tried it on my doll and decided the sleeves were going to be too long. They needed shortening by 1/4" as well. Being the lazy sewist I am, I just turned it up that much extra because I'd already finished the edges and didn't want to cut and re-overlock (I think I'd already changed back to black thread). Next time I should actually shorten the sleeve properly before cutting the fabric.

Sewed up the side seams and I was basically done!  I decided to do proper buttons and buttonholes on this because it's easier with the front opening and I'm sure it will sometimes be worn open, plus I think this looks better than false buttons with snaps underneath.
I really loved using this pattern.  The instructions are excellent and the pattern includes so much detail, which I forgot to take photos of, like a tab on the back waist and the perfectly proportioned pockets.

This gives me so much confidence to try converting other American Girl patterns to fit Journey Girls.


Once I had finished the coat, I had the urge to make a Rocky Horror costume to go underneath... but that ones definitely going to be for MY doll, not my daughters!

Wednesday, March 28, 2018

Because I'm an Over-Achiever


I can't remember when my daughter started asking for a school uniform for her Journey Girl but I always intend to make one.  This is my daughter's school dress:


My previously mention problems with patterns for the dolls meant I'd been putting this off. I had a blue check cotton in my stash which I'd intended to use even though it wasn't really similar, but then I was op-shopping and found a cotton that was almost exactly the right check pattern!!

Left is fabric from my stash I'd planned to use, right is my excellent op-shop find!

After watching the How to Make Dolls Clothes Class on Craftsy, I decided to attack the school dress project, with the help if this book that I bought ages ago:


In the Craftsy class, Joan teaches you how to make a sloper for your doll.  With this as a base, I used the A-line dress pattern included in the book, merging sizes to get the best fit. To work out the pleats and yoke etc, I traced off a copy if the front and back and then worked on measurements based on  the same ratio as the real uniform.  I just worked rough ratios such as 1/3 full length measurement etc.  I drafted mock cuffs on the sleeves, and a collar.  A quick google search showed me how to make the front placket (I used the 2 piece placket instructions). The sleeve pattern ended up a little smaller than the armscye, so I just made it a bit bigger and gathered rather trying to make it fit perfectly.

This is the basic A-line dress front piece with markings for front placket size and front pleat location and size

To make the black trim on the collar, I cut bias binding in half and top stitched it along the folded edge, with the raw edge against the raw edge of the white. This was then enclosed when I attached the collar facing and bagged out.  For the cuffs I attached it the same, but then folded over and top stitched to the sleeve.


Black trim attached to the (ill-fitting) collar piece
After that effort, my collar piece didn't fit the dress!! So I grabbed the collar from the lab coat I was making at the same time (blog post coming here!), and it seemed to fit better, so I cut new collar and off we went again.


I decided on snaps with decorative buttons, rather than buttons and buttonholes, basically because I got lazy.  I also made her "school knickers" to match the ones I made my daughter.


Unfortunately once I'd got it together, I hadn't made the front opening quite big enough and it's very snug getting on and off, but my daughter got it off without help so it can't be too bad.


This is one of these projects where I even impressed myself with how awesome it came out. Of course when she took her doll to school the next day, I noticed the error I had made by not cutting the front placket and back belt on the bias. Oh well, "next time"....

I guess now I have to knit her a school cardigan in the right colour.  Here, she's wearing a cardigan my Nanna knitted for my Cabbage Patch Kid in my school uniform colour (over 30 years ago).

Saturday, March 17, 2018

A journey in Journey Girls

My daughter got a Journey Girl doll for Christmas a year ago. I was very excited at the prospect of making lots of dolls clothes for her.  Years ago I'd bought my niece a doll and made it some clothes, but hadn't realised at the time that the doll was 16" and the patterns were 18". So now all these patterns that had been useless were finally useful!!

Sadly life is never that simple.

Commercial patterns, and most indie PDFs I've come across, draft for an American Girl doll, which is a different shape to Journey Girls. There are several websites/blogs comparing measurements so I wont go into details but essentially the American Girl dolls are wider through the body so all the clothes end up too big.

Before I realised this, I downloaded this free pattern for an Elsa inspired dress and made it up without fitting. I thought a mock-up wouldn't be necessary for a commercially available doll. I've learnt that lesson the hard way!  Luckily my then 6 year old thought it was amazing.


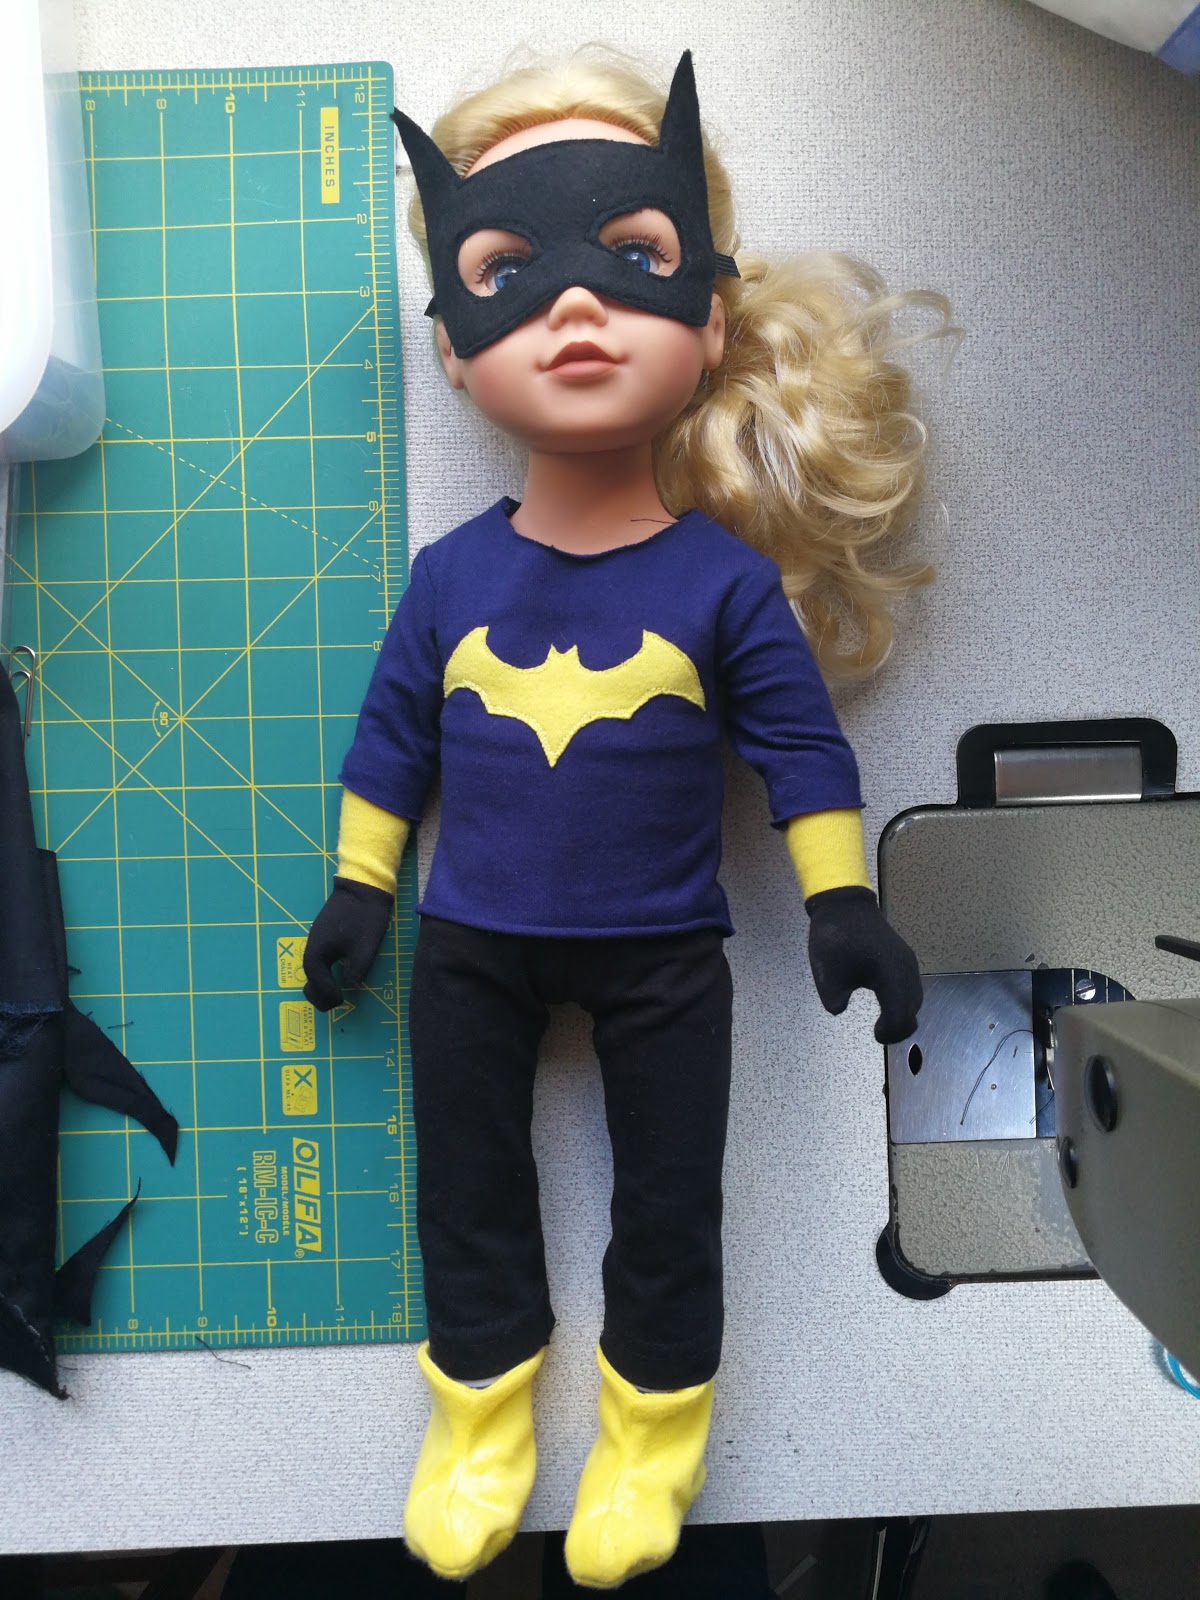
Following this, an internet search for patterns specifically designed for Journey Girls brought me to Pixie Faire, who offer (among other things) a free t-shirt pattern by Liberty Jane Clothing.  I also got a leggings pattern from Artsy Fartsy Mama; then found a glove pattern from Diane Morello on Pinterest; and boots from Peek-a-Boo Pattern Shop (which should fit but I used the wrong seam allowance so they are a little big)
Which gave me Batgirl!!
DC Super Hero High inspired Batgirl
For the mask I just googled 'bat mask template' and printed one in a smaller scale to fit, then cut it out of felt.

That t-shirt pattern from Pixie Faire came in handy again recently.  After Christmas just gone, my daughter "needed" an Emma Wiggle skirt and I decided to make a matching outfit for the doll from left overs.  The skirt is just a circle skirt with 'waist' measurement being about 1" larger than her hips and then sewn onto elastic.


(Yes that is a different doll, that is MY doll that I got last year so I can make costumes for it!)

Over the year, I haven't done as much doll sewing as I'd hoped for, because of the effort in trying to mock up a pattern and make it fit, especially when sleeves were involved.

Then, the other week, Craftsy had their free weekend and I watched this How to Make Dolls Clothes video/class by Joan Hinds.  In the video she shows you how to quickly and easily make a sloper for your doll, and then compare it to existing patterns to see where/if you need adjustments.  This has given me a new lease of life on my doll sewing and I have recently sewn up two more garments, which I will blog about shortly.  Stay tuned!

LinkWithin

Related Posts Plugin for WordPress, Blogger...