Showing posts with label bags. Show all posts

Saturday, September 10, 2011

Mini Book Bag - Tutorial

Today I went to a 1st birthday party for one of the bub's in my mums' group and wanted to take a gift.  I hate giving "more toys" because most kids these days have too many.  I'd given books as a gift previously so wanted to do something a little different.  I decided on making a mini book bag.  It's not big enough to be a school library bag, but is great for toddlers small board books, and I'm sure it will get used for all sorts of other things too.
His mum loved it and was showing it around to everyone.  She even said to someone "did you see this?  Oh, you did... will here, see it again!"
It's a great little item that's quick and easy to make, and turns into a really special, personalised gift.

A note on size
There are three books in my bag, the largest is 6" x 7-1/2" and all the books together are 1" thick.  My finished bag is approximately 7-1/2" wide x 9" tall and the books just fit nicely.  You can make your bag any size you want depending on what size books you have.  Just cut your fabric 1" larger in both directions than your desired finished bag size.  If you make the bag wider you will also need to allow extra twill tape for the handles.  When considering size, don't forget to factor in the thickness of the books as well as the height and width.

What you'll need
2 rectangles of main fabric 8-1/2" x 10"
2 rectangles of lining fabric 8-1/2" x 10"
2 rectangles of batting  8-1/2" x 10"
2 pieces of 1" wide twill tape, each 12" long
Embroidered name panel (optional)
I made my name panel using the built-in fonts in my embroidery machine, and then trimmed the panel leaving 1/2" all around the name.  You could easily hand embroidery a panel, use fabric paint/pens/crayons or even screen printing.

Fold over 1/4" all around the name panel and press.  I like to add scraps of fusible web to the back (which I save specially) to help hold the piece in place when I'm sewing it down.

Position the name panel where you would like it and press it onto the bag front then sew close to the folded edge.

Lay out your fabrics in the following order from bottom to top (as shown in photograph):
Wadding
Bag back - right side up
Bag front - wrong side up
Wadding
Make sure all your fabrics align around the edges, I have just laid them out like this so you can see which layer goes where.

When all edges are matched up, sew down one long side, across the bottom and back up the other side with a 1/2" seam allowance.

Place your two lining pieces right sides together.  With a seam allowance slightly larger than 1/2", sew down one long side, across the bottom, then 1"-2" up the other side.  Reinforce your stitches (reverse) and then stop sewing.  Sew 1"-2" down from the top on that side, ensuring you reinforce at the edge of the opening. (Click on the image for a better view)

Trim the corners on your bag and lining pieces, ensuring you don't cut too close to your stitching.

Turn the bag (with wadding attached) right side out, but leave your lining as it is.  Pin your handles to the outside of the bag.  The handles should fall down the side of the bag which raw edges lined up to the raw edges of the bag (back handle is folded up for photo only).  I've placed my handles 1"-2" in from the side seams, you may need to adjust this measurement if you have changed the size of your bag.  Baste handles in place if you like to baste things (I just use pins)

Place the bag with the handles inside the lining.  Match up the side seams and pin in place.

Sew around the top edge with a 1/2" seam allowance, reversing over the handles to reinforce.

Trim the wadding from the seam allowance to reduce bulk

Pull the bag out through the opening in the lining, then push the lining into the bag (get it right down into the corners) and check the top edge.  If the lining rolls to the outside too much you can turn it all inside out again through the opening and increase the seam allowance along the bottom edge of the lining.  In my case, it was just right, the little bit of roll you see will be fixed with a good press.

Pull the lining out of the bag again and lay flat.  Press the seam allowance in the opening and make sure the two edges line up neatly.

Top stitch the opening close to the edge.  If you prefer a neater finish you can slip stitch the opening closed by hand.

Push the lining back into the bag, remembering to tuck the corners right down into the bottom.  Press the top edge neatly and fill with books!

Thursday, July 29, 2010

Craft Show Round Up

I thought when I finished work I'd have more time to update here more regularly.  Doesn't seem to be the case.  Although I have had things on nearly every day since finishing.

The first of which was last Thursday going to the Craft and Quilt Fair.   I managed to stay within my budget, sort of ;)  I had a shopping list of supplies I needed for current projects but still hoped to pick up something a bit new and/or exciting.

I picked up a few essentials such as applique fusible web, embroidery stabiliser, bag wadding, needles for embroidery, applique and quilting, then I got some fun things.  I've been wanting to do another latch hook for ages (did one once as a kid), but could never justify the price of the kits when I didn't really have a purpose in mind.  Thanks to baby-on-the-way, I decided I could make a colourful rug for the nursery.  Don't need a rug as there is plush carpet, but anything to add colour to the room is great.  And the plus was that this came out of 'baby budget' and not out of 'craft show budget' ;)

The other fun thing I got was my obligatory quilting pattern (I seem to end up buying a quilt pattern at every show I go to).  I had decided that for my pregnant music teacher friend I wanted to make a quilted wall hanging for the nursery as a gift for when the baby was born.  I saw a pattern from Joan's Own Creations and just couldn't resist.  It's not particularly a baby pattern but I'm going to make it out of more child friendly colours and then it will also last long beyond them being a baby.
Instead of using gold for the brass instruments I'm going to do things like metallic purple.  I might even make the piano keys multi-coloured!  Who knows, I haven't thought that hard about it yet.  Got too many other things to finish first.  The baby is due in November, but I've got until Christmas to make it really because I'll be going up to Sydney then, so don't see the point in paying for postage just to get it there 6 weeks earlier.

I also bought some books on quilting to help me with my current projects.  Good basic details in the books, concentrating on techniques rather than just giving you quilting patterns etc.
I've started doing some hand quilting on my elephant quilt, but discovered that I need a lot more practice!  I also might need to attend a class to get someone to help me with the rocking stitch method as I can't seem to do that.  I gave up in the end and am just doing stab stitch.

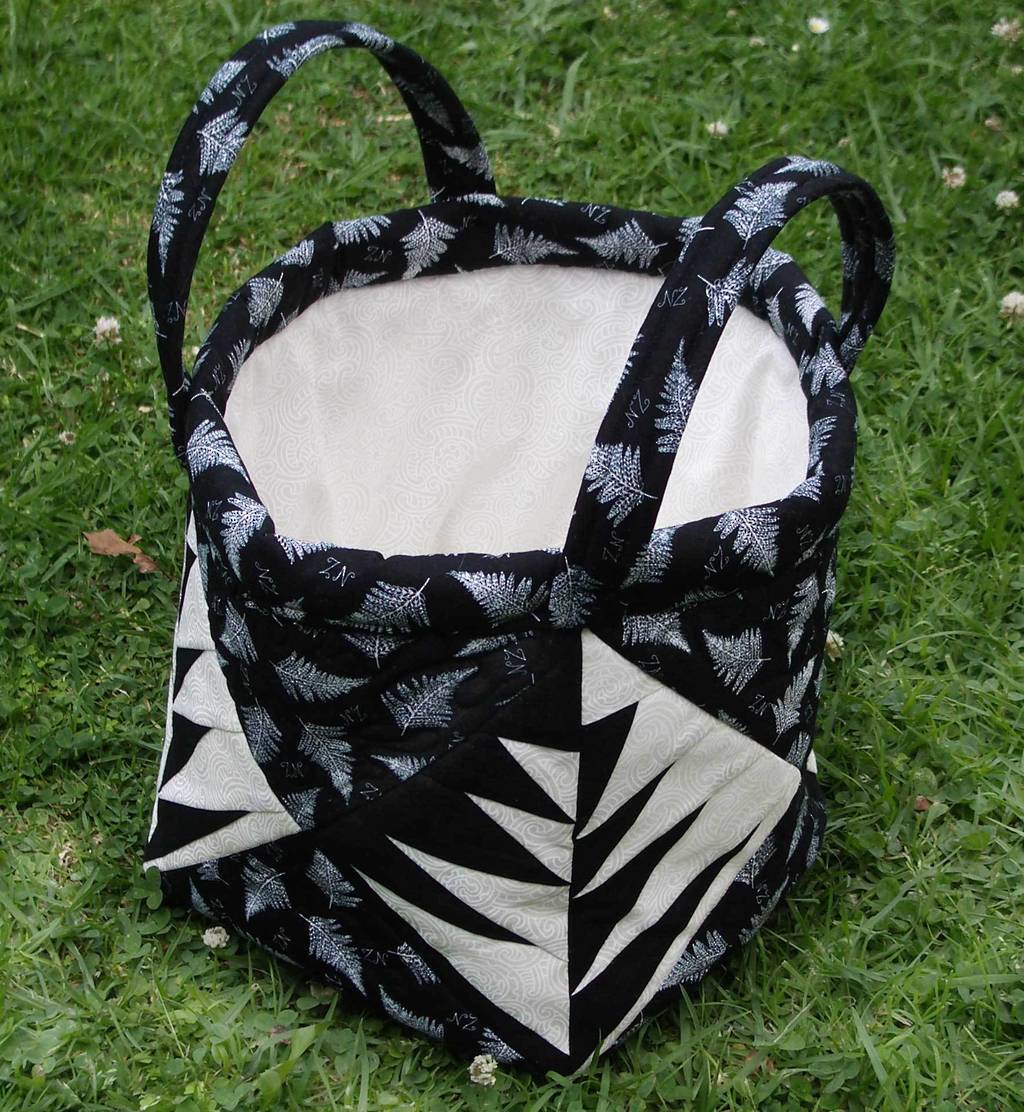
And just because I took a photo of it, here is the bag wadding in action!  It's great because it keeps the bag standing up-right on it's own.  That's my fern bag making some progress (until I rearranged the sewing room and haven't got everything set up again yet).

Sunday, January 17, 2010

Has it really been a week since I last posted?

I've finally done some craft work following Christmas.  Yesterday was my monthly stitch 'n' bitch with my friends so I started working on my NZ fern bag from Kiwi Quilts.


So far all I've got done is the fern panels, but actually I think that's a large portion of the work.  From here on it it's just sewing squares or triangles together!

It's done using paper piecing technique, which I haven't tried before.  I'll document it more when I finish the bag and do a proper write up, but at first it looked fiddly but in the end I think it was rather an easy technique.  I did it using vilene underneath.  I'll have to try another one actually using paper and compare.


This afternoon in a fit of inspiration, I also started work on my idea the Monthly Design Challenge over at  Finki.

I'd had an idea in mind for a few months now, and then when the theme came up as Turning Japanese, it was the perfect motivation I need to get my design happening.  A visit to Lincraft on Friday night to socialise with a friend involved the discovery of the perfect fabric, so then I had no excuse!

So here is a sneek peak.....


Now I just have to make sure and finish it before the end of the month!!

LinkWithin

Related Posts Plugin for WordPress, Blogger...