Thursday, September 29, 2011

I've done it!

I have an Etsy shop

I was hoping to have three patterns ready, but the last one is still in progress, so here are the first two.
This completes my September Challenge, and I've also decided it completed my very first challenge in February.  A little while ago I realised that I wasn't getting the time in the sewing room to create enough 'stock' to hold a physical market, and I had more chance of developing the patterns and marketing those.  I decided that my February Challenge to have a market stall by the end of the year could also include an 'online market', so Etsy shop it is*.

To go along with my new Esty shop, I have also created a Facebook Page, so if you are a Facebook-a-holic, please like me so I'll feel liked.

All I have to do now is keep up with pattern designing and writing.  Luckily I have a few already planned out.

And for those of you who like my free tutorials, don't worry, I will still be posting them for the smaller projects.


* It's my 'game' so I can change the rules if and when I want!


Wednesday, September 28, 2011

A Labyrinth of Masks

Last weekend we went to a friend's masked birthday party.  My husband, being the creative type he is, said to buy some plain masks and he'd decorate them.  So, inspired by the Labyrinth movie, that is what he did....

I saw a character in the movie that had little antlers and decided that's what I wanted, so that's what hubby made me ('cause that's the sort of guy he is!).  My mask was painted white, then detailed with gold glitter and more white paint, plus the antlers and feathers on top.

My husband's mask was paint several colours over the top of each other, the details added with gold beading wire, braid left over from one of my old costumes and feathers.

And I'm rather impressed to say that other than the actual base masks which I bought especially, everything else came out of my sewing/craft room (oh, except a few things which I think came out of the garage.... I'm not sure what's holding those antlers up!).

Sunday, September 25, 2011

Clucky Reborn

After a good scrub and a run through the washing machine, I have recovered Clucky and her chicks from the marking pen disaster.


Now I just have to get onto making the second one for a friend.

Wednesday, September 21, 2011

My apologies to the thread

It appears my chook disaster on the weekend was not the fault of the thread after all.

I sat down at my sewing machine tonight and looked at the little chicks which were sitting on the table and realised that one of them had black staining around the body but not near the eyes.

Further investigation revealed that the culprit was in fact the pen that I had used to mark the shapes... and consequently forgotten about.  I'm not entirely sure which pen I had used now, but it obviously wasn't an appropriate fabric marking tool.

This is good news and bad news.  Glad I found this out before I started making the second one.  I was able to mostly wash the pen off the fabric.  I'll have to re-mark it with something else to start sewing.  The tiny remnants of the pen marks shouldn't run any more.

But as for my daughter's which is already sewn up, things aren't quite so easy.  I scrubbed the little chicks and their wings as best I could, and they look a lot better but not perfect.  My husband suggested we run them through the washing machine a couple of times and see if it makes them any better.  It also means that I may have some problem with the mother chicken as well as the chooks, and this could get ruined totally if the washing does not work.  I guess it's better to find it out now (and potentially have to remake the whole thing) than to find out later when my daughter gets it wet and ruins a beloved toy.

I had already ordered a bundle of a different brand of thread which is labeled as colour fast, which I don't appear to need now... but I guess a delivery of pretty thread will make me feel better (after the sick feeling I have now knowing that the mistake was entirely mine).

I'll keep you posted on the progress of Clucky.

Tuesday, September 20, 2011

Doing as I'm told

Last night I wanted to head to my sewing room (as I usually do in the evenings) but I didn't know what to work on.  I always get this problem when I've been focusing on one thing and then it's finished.  It's not that I don't have plenty of things to do, or even plenty of things already half done in the middle of my work table, it's just that I need to find direction again.

So last night my husband suggested that I should work on something for me.  I've always been making things for him, or the baby, or presents, but nothing for me for a long time (I think the last thing was maternity clothes).

It took me a long time to decide what to do but finally I settled on this doll kit which I'd bought from Katkin Designs way back before ... I can't even remember when because I can't find a blog post about it.

The previous doll from Katkin Designs that I'd made I decided to purchase the printed face, but with this new one I thought I'd be daring and trace the face on myself using the Prismacolor pencils.  So that's what I've been working on last night and today.
I'm rather pleased with the outcome, even though I know it's not perfect.  The pattern provides the picture to trace and includes very details instructions on how to colour/shade the face as well as a close up photo of the face from the completed doll on the cover.

And on a completely unrelated topic, here are some more pictures of my garden taken on the weekend.

Some leaves starting to grow on my cherry tree, which I'd been worrying had died (I know they are dormant in winter, but this tree was looking very sad even for a dormant one)

And another ranunculus flower to prove that there is more than just orange ones there!
I need to buy some later flowering bulbs next year as most of my bulbs have finished already and it's not even the end of September!

Sunday, September 18, 2011

My little girl is one


Well, she will be tomorrow, but we did the 'party' celebrations today so that dad would be home to join in.

I made her a cake and daddy helped to decorate it (most of it is still left so feel free to come over and taste some ;)

I was rather impressed with the outcome.  I had the idea for the marshmallow flowers out of my cake book and then thought it would look nice with vine-y/branches in between so the artistic husband learnt how to use the icing tube and away he went.  I also found a tub of sugar butterflies in the cupboard and put them all around the sides.  The blocks were his idea to use up the left over cake where we'd cut out the number and he did the decorating on them.

I had decided that I'd better start practicing with these cakes so by the time she is old enough to care about what the cake looks like I'll actually be half decent.  After today's effort I don't really think I've got much to worry about!  I'm a little sad now that there weren't more people to see the cake (just us and my best friend with her soon to be husband).

There was a low point to the day unfortunately.  As her handmade present, I'd made her Clucky by Melly & Me.  As soon as I saw the pattern I knew I wanted to make it.  Most of my evenings recently have been spent in the sewing room getting it finished in time.  I was so excited to give it to her this morning that I forgot to take photos beforehand.  She loved it.  The surprise on her face when she discovered that the little chicks came out was wonderful.

The downside?  Because she is one, everything goes into her mouth.  I found out the hard way that the embroidery thread I had used for the eyes was not colour fast (despite it saying so on the wrappings).  Two of the chicks are completely ruined with black dye running over them.  A third is not as bad and I can salvage the wings, the fourth hadn't made it to her mouth.  I'll now have to re-make three little chicks before I can let her have it again.  She cried when I took them away from her, I felt so bad.

So now my problem is that I need to find some guaranteed colour fast thread to embroider the eyes with.  Any suggestions?  What do you use?

I've emailed the company in question about their thread, and will let you know their response (if I receive one).

Friday, September 16, 2011

Birdie Stitches June

Although I feel like I've hardly spent any time in my sewing room lately, I have managed to catch up on the June block of Birdie Stitches (although I'm rapidly falling behind on September!).

This one sat on the backburner for a while because I didn't like the idea of putting the year into the quilt.  This quilt is destined to be my daughter's Big Girl Bed quilt, if she likes it.  I wont finish the quilt this year, and this year isn't when she was born or anything like that.  I had contemplated putting her name, but knowing my luck, if I did that, she'd tell me she didn't like the quilt!

I was looking through the Birdie Stitches flickr group the other day to see what other people had done with this block.  Someone had included the word 'dream' and I thought that was rather nice.  I consulted with my husband, he's always good at things like this, and he suggested the word 'soar'.  It kept with the birdie theme and has a great motivational meaning too.  So once that was decided, I finished the block rather quickly.

I really enjoyed embroidering the cursive writing and am thinking I should include them in my other work a bit more.

Thursday, September 15, 2011

I [heart] Fabric

Just after I posted about my August solids arriving, my September bundle arrived from Pink Chalk Fabrics, along with the February bundle I'd ordered to catch up.
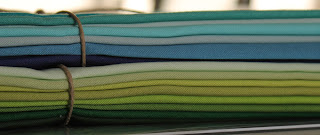
February was I Heart Pink and is a collection of Kona Cottons.  The September bundle is called Apple Cider which is more Kona Cotton and a Bella Solid thrown in.  I love the way the fabric in these bundles look together so I'm storing them together rather than separating them out into colour groups.

The day after the above fabric arrived, an order from Fat Quarter Shop turned up, which I'd ordered some time between the August and September solids club.  I follow them on Facebook and they're always posting about half price specials.  The other day I decided to click on it and found the specials contains some great blenders and other cute things.
The top two are Shipyard Organic range, the black one is from a range called Sketch, then all the rest are from a range called Smirk.  The last three fabrics are quite fun, yes they are cats all over the black fabric!

Also in the mail this week I got my 'participation award' from Lyn for completing her Retro Nine Patch.  It's some lovely fabric, buttons, a sewing machine brooch and some wooden dressmaker models.  I'll have to think of something really decorative to use those models for in my sewing room!  Thanks Lyn!

So lots of shopping recently but not so much sewing.  I do have a few projects underway....

Something for Halloween

And some chickens

Wednesday, September 14, 2011

Colours

I follow the Design Seeds blog, and more recently started following Photo Card Boutique.  They take a photograph and pull colours out of it to make a colour palette.

I love seeing how the palette can have a totally different feel to the photograph.  Colours are pulled out which you don't necessarily notice in the photograph.  A colour which is a tiny speck in the photo can dominate the colour palette.

I've been meaning to have a go at it myself.  It's a way to turn memories into a quilt design that focuses on the colours and the feelings rather than the images and the design.

So here is my first go

It's a photo from our honeymoon at Uluru (Ayer's Rock).

I'm really quite excited about the idea of turning memories into craft!  I could spend all night sitting here playing with photos.

Tuesday, September 13, 2011

Fabric comes to those who wait

After waiting patiently for a month, my August Monthly Solids Club bundle finally turned up from Pink Chalk Fabrics.  Apparently the Aussie dollar is doing so well at the moment that customs is backlogged with mail from everyone buying overseas!

This bundle is called Hot Summer Nights and includes Kona solids, with a few Kaufman Organic Cottons thrown in


And I just saw the September bundle on their website... can't wait for that one to arrive!

With the August bundle I also bought the March and June bundles to catch up.  So much lovely colour!  These are Sea Gem Studio (Moda Bella Solids) and a bundle of Kona Solid greens.

And Kathy included a lovely little present.  I already have one of these stashed in my fabric shelves, so now I can dream up a project which uses two of them!

I do so love colour and fabric

Saturday, September 10, 2011

Mini Book Bag - Tutorial

Today I went to a 1st birthday party for one of the bub's in my mums' group and wanted to take a gift.  I hate giving "more toys" because most kids these days have too many.  I'd given books as a gift previously so wanted to do something a little different.  I decided on making a mini book bag.  It's not big enough to be a school library bag, but is great for toddlers small board books, and I'm sure it will get used for all sorts of other things too.
His mum loved it and was showing it around to everyone.  She even said to someone "did you see this?  Oh, you did... will here, see it again!"
It's a great little item that's quick and easy to make, and turns into a really special, personalised gift.

A note on size
There are three books in my bag, the largest is 6" x 7-1/2" and all the books together are 1" thick.  My finished bag is approximately 7-1/2" wide x 9" tall and the books just fit nicely.  You can make your bag any size you want depending on what size books you have.  Just cut your fabric 1" larger in both directions than your desired finished bag size.  If you make the bag wider you will also need to allow extra twill tape for the handles.  When considering size, don't forget to factor in the thickness of the books as well as the height and width.

What you'll need
2 rectangles of main fabric 8-1/2" x 10"
2 rectangles of lining fabric 8-1/2" x 10"
2 rectangles of batting  8-1/2" x 10"
2 pieces of 1" wide twill tape, each 12" long
Embroidered name panel (optional)
I made my name panel using the built-in fonts in my embroidery machine, and then trimmed the panel leaving 1/2" all around the name.  You could easily hand embroidery a panel, use fabric paint/pens/crayons or even screen printing.

Fold over 1/4" all around the name panel and press.  I like to add scraps of fusible web to the back (which I save specially) to help hold the piece in place when I'm sewing it down.

Position the name panel where you would like it and press it onto the bag front then sew close to the folded edge.

Lay out your fabrics in the following order from bottom to top (as shown in photograph):
Wadding
Bag back - right side up
Bag front - wrong side up
Wadding
Make sure all your fabrics align around the edges, I have just laid them out like this so you can see which layer goes where.

When all edges are matched up, sew down one long side, across the bottom and back up the other side with a 1/2" seam allowance.

Place your two lining pieces right sides together.  With a seam allowance slightly larger than 1/2", sew down one long side, across the bottom, then 1"-2" up the other side.  Reinforce your stitches (reverse) and then stop sewing.  Sew 1"-2" down from the top on that side, ensuring you reinforce at the edge of the opening. (Click on the image for a better view)

Trim the corners on your bag and lining pieces, ensuring you don't cut too close to your stitching.

Turn the bag (with wadding attached) right side out, but leave your lining as it is.  Pin your handles to the outside of the bag.  The handles should fall down the side of the bag which raw edges lined up to the raw edges of the bag (back handle is folded up for photo only).  I've placed my handles 1"-2" in from the side seams, you may need to adjust this measurement if you have changed the size of your bag.  Baste handles in place if you like to baste things (I just use pins)

Place the bag with the handles inside the lining.  Match up the side seams and pin in place.

Sew around the top edge with a 1/2" seam allowance, reversing over the handles to reinforce.

Trim the wadding from the seam allowance to reduce bulk

Pull the bag out through the opening in the lining, then push the lining into the bag (get it right down into the corners) and check the top edge.  If the lining rolls to the outside too much you can turn it all inside out again through the opening and increase the seam allowance along the bottom edge of the lining.  In my case, it was just right, the little bit of roll you see will be fixed with a good press.

Pull the lining out of the bag again and lay flat.  Press the seam allowance in the opening and make sure the two edges line up neatly.

Top stitch the opening close to the edge.  If you prefer a neater finish you can slip stitch the opening closed by hand.

Push the lining back into the bag, remembering to tuck the corners right down into the bottom.  Press the top edge neatly and fill with books!

Friday, September 9, 2011

Quilter Blogs

You can now find me and many other great quilting blogs over at quilterblogs.com


There is so much talent over there, I could be stuck reading blogs for hours, days, weeks even!

Thursday, September 8, 2011

Retro Nine Patch all finished

Now that Lyn has posted all the quilts for the showcase of her Retro Nine Patch, I figured I'd better share my finished product with you.

I'm rather pleased with the outcome.

I decided to 'risk it and do an all over stipple quilting pattern.  I was a bit skeptical at first of quilting over the top of the embroidery but in the end it was easy, I just had to be careful around the lazy daisy and chain stitches as they got caught on the open-toe foot.  I'm rather please that I did quilt over the embroidery, because I would like this to be a doll quilt for my daughter but was then worried about the embroidery getting snagged all the time.  It's pretty much safe and sound under all that quilting now.

I ended up using a clear thread because any colour I chose would have shown up on the blocks or the sashings, and I didn't want that with stipple quilting.
I just added the single cream border because I didn't want to make it too big, but I loved the open, fresh feeling which Lyn achieved on her tablecloth.

All the fabrics came from my stash, except for the cream for the blocks.  Consequently the backing doesn't really match the front that well, but the binding works for both sides and I don't think the dollies are going to mind.

I had originally thought to try my hand a decorative quilting, with flower designs on the corner stones etc, but lost confidence.  Maybe next time.

Since this is a doll quilt, I figured I'd better try it out, so here it is 'in action'.  This also gives you an idea of the size since I did it half-scale to Lyn's instructions.

Don't forget to go and check out the other Retro Nine Patch quilts in Lyn's showcase.
Link no longer active, sorry

Monday, September 5, 2011

It pays to keep a messy house

Recently Amitie rang a giveaway, and they asked for tips on how to juggle life's tasks.  Random selection didn't pick me as a winner, but they decided to offer a second prize and picked me as their 'favourite comment'.  And my tip to juggling all life's tasks?


"I think my survival tactic is: don't do the housework!! I only do things that need doing, hence we have a walk-in-robe that you can't walk in because there are clean clothes all over the floor and stuff like that.

Means I'm a lot more sane!"


So now I'm the happy little owner of a jelly roll (or jelly-flat because it came as flat strips for easy postage) of Robert Kaufman's Treasures and Titbits 

Also recently I received an order from the Fat Quarter Shop of some Kona Solids charm squares, plus Kate Spain's Terrain and Me & My Sister Design's Amelia

The Aussie dollar is doing really well at the moment so it's great to order stuff from the US, but it's taking AGES, apparently because customs is overloaded with people buying online.

Thursday, September 1, 2011

Challenge Yourself - September

A quick one today as I'm off to swimming lessons for the bub in a few minutes.

I did a post the other day about my progress on last month's challenge here, so you can see where I got up to. Have made some more progress on the last Birdie Stitches since then, but still not finished yet.

This month I've decided that my challenge is to have an Etsy store up and running by the end of the month.  I'm sure it's pretty easy to set up an account and get a store going, but I have some things I want to get in place before I just dive in and do it.  I want to make sure I do this 'properly' rather than starting something and fumbling my way through the beginning.

That's all I've got time for, my bathers are waiting!!

Are you challenging yourself this month?  Join in below if you are


LinkWithin

Related Posts Plugin for WordPress, Blogger...